Setting up the MCP server
This is a one-time admin setup. When it’s done, anyone on your team with a PinionPlus seat can connect their own AI client and ask Pinion questions — each person authorizes as themselves, so they only see their own data.
Pinion’s MCP server is AI-tool-agnostic. The steps below cover the Pinion and Salesforce side, which is the same no matter which assistant you connect. The one client-side step — adding the custom connector to your AI tool — varies by tool, so for that step follow your AI tool’s own documentation for adding a custom MCP connector.
The flow is four steps:
- Activate the Pinion MCP server and its tools.
- Configure the packaged Pinion MCP External Client App so a client can authorize (OAuth).
- Copy the Server URL and Client ID.
- Connect your client and authorize.
1. Activate the Pinion MCP server
Pinion’s tools are packaged as Salesforce invocable actions. On an Enterprise-edition org they’re registered automatically, so you don’t build them — you publish a server and choose which ones to expose:
-
In Setup, search for MCP Servers.
-
Create (or open) a custom MCP server.
-
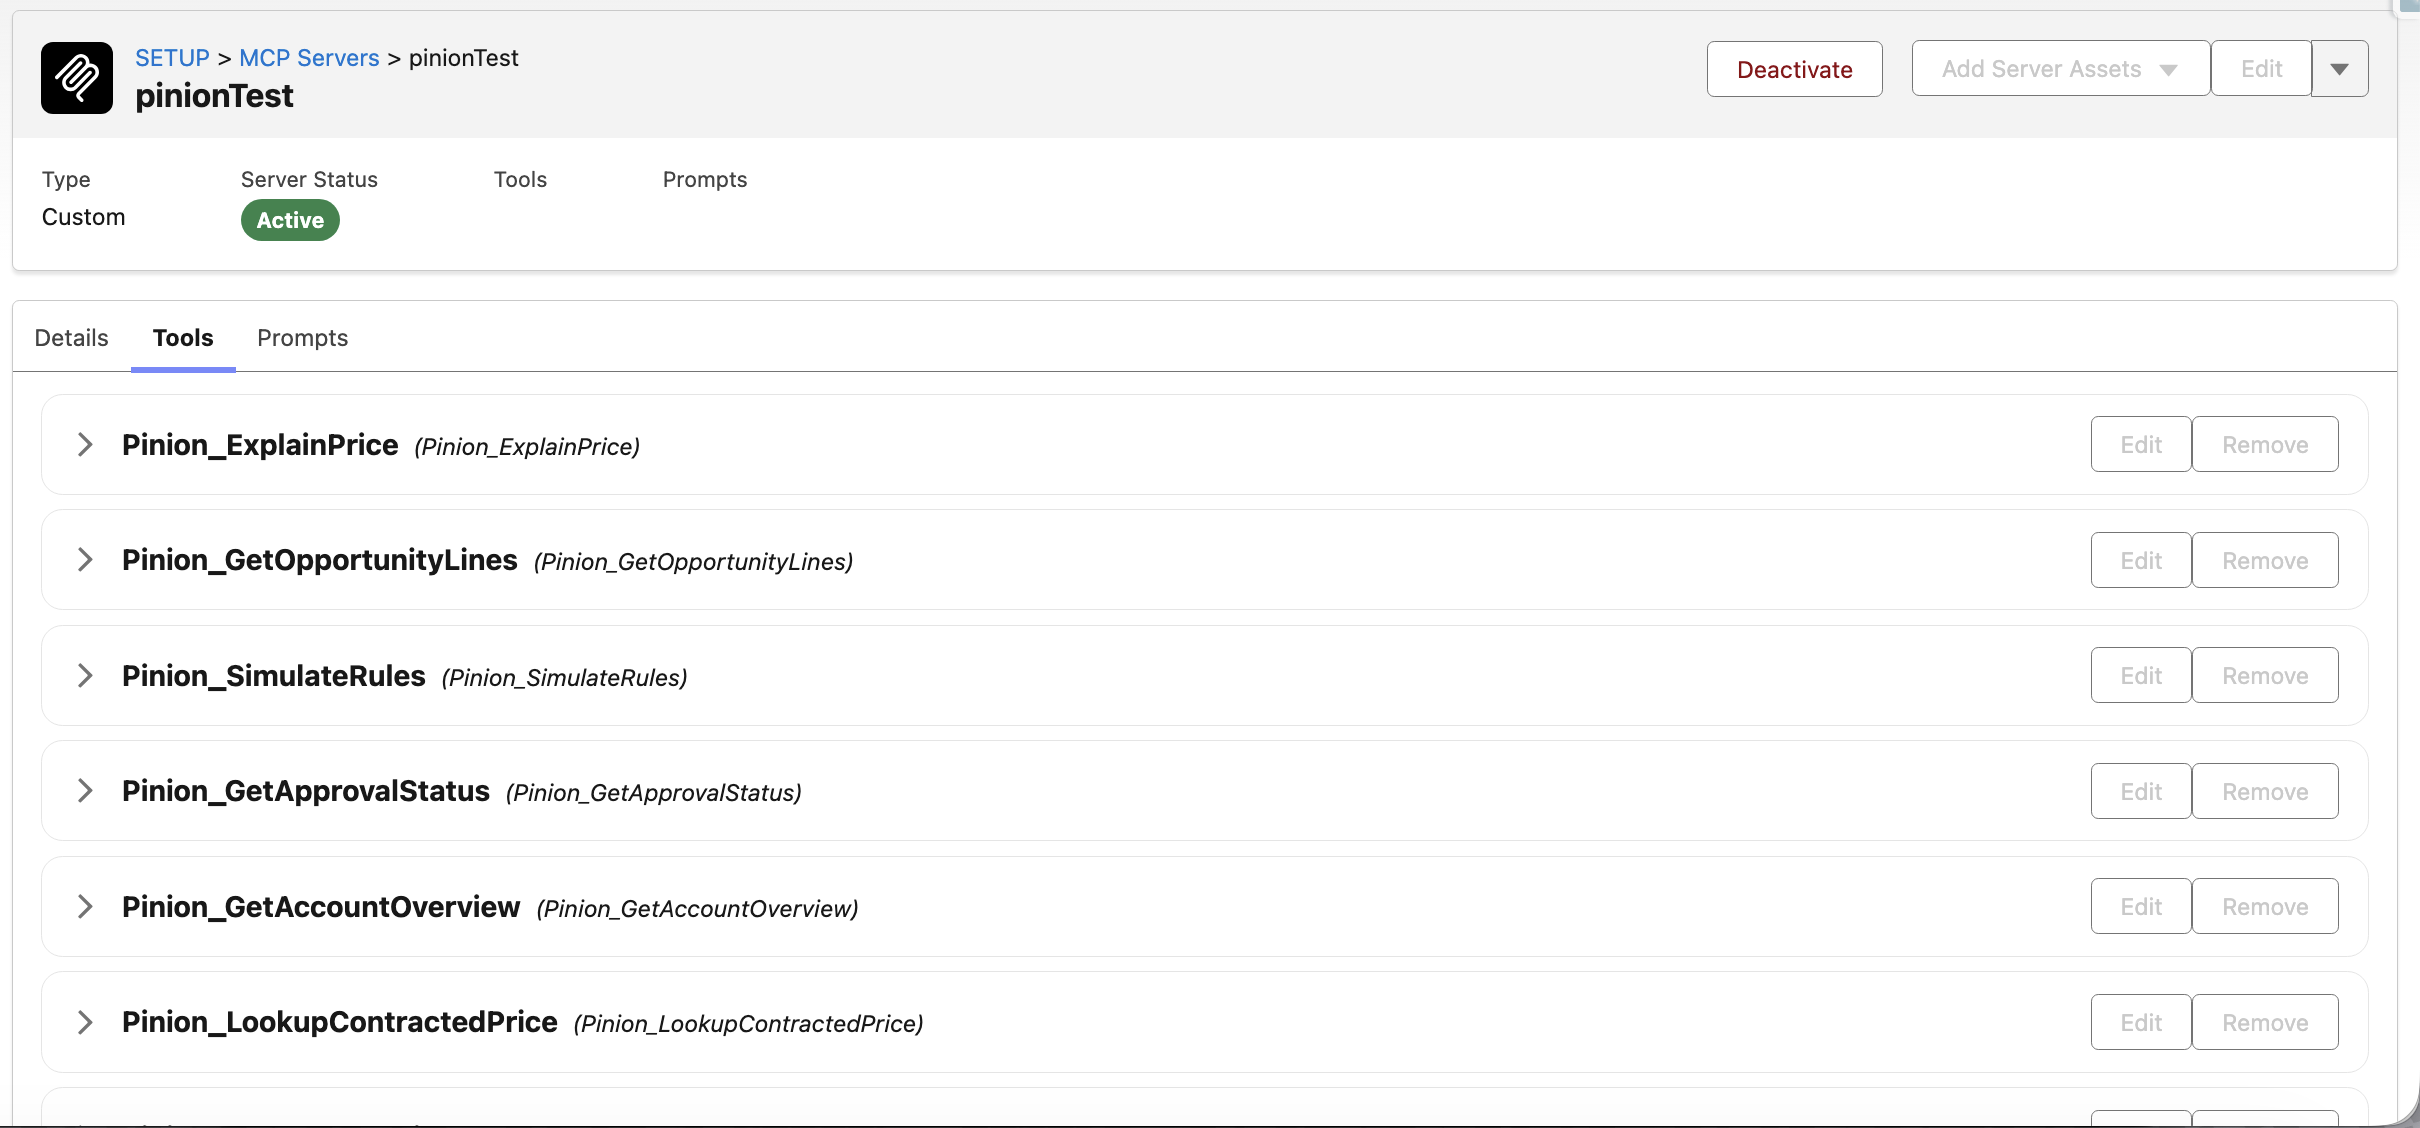
Add the Pinion tools. All Pinion tools appear under the Pinion CPQ category. Add the ones you want to expose, by the labels below. Most are read-only — mark them so; the ones flagged (action) change state, so mark those not read-only.
Read:
Pinion: Find deals (discovery)Pinion: Pipeline summary (what's my number)Pinion: Get products (catalog discovery)Pinion: Get deal line items (quote state)Pinion: Estimate a price (what-if)Pinion: Explain a price (waterfall)Pinion: Simulate product & pricing rulesPinion: Look up a contracted pricePinion: Get my approvalsPinion: Get approval detailPinion: Get approval statusPinion: Brief me on an accountPinion: Get contract lines (subscriptions + assets)Pinion: Contract revenue metrics (MRR / ARR / TCV)Pinion: Renewal forecastPinion: Get activity timeline (last contact / next step)
Actions (state-changing — add only what you want your team doing from an assistant):
Pinion: Configure & price a deal (Save & Sync)(action) — writes line items through the real Save & Sync pathPinion: Submit for approval(action)Pinion: Decide approval (approve / reject)(action)Pinion: Create renewal opportunity(action)Pinion: Create amendment opportunity(action)Pinion: Log a follow-up (create a task)(action)Pinion: Generate quote / proposal PDF(action)
-
Activate the server.
2. Configure the packaged Pinion MCP External Client App
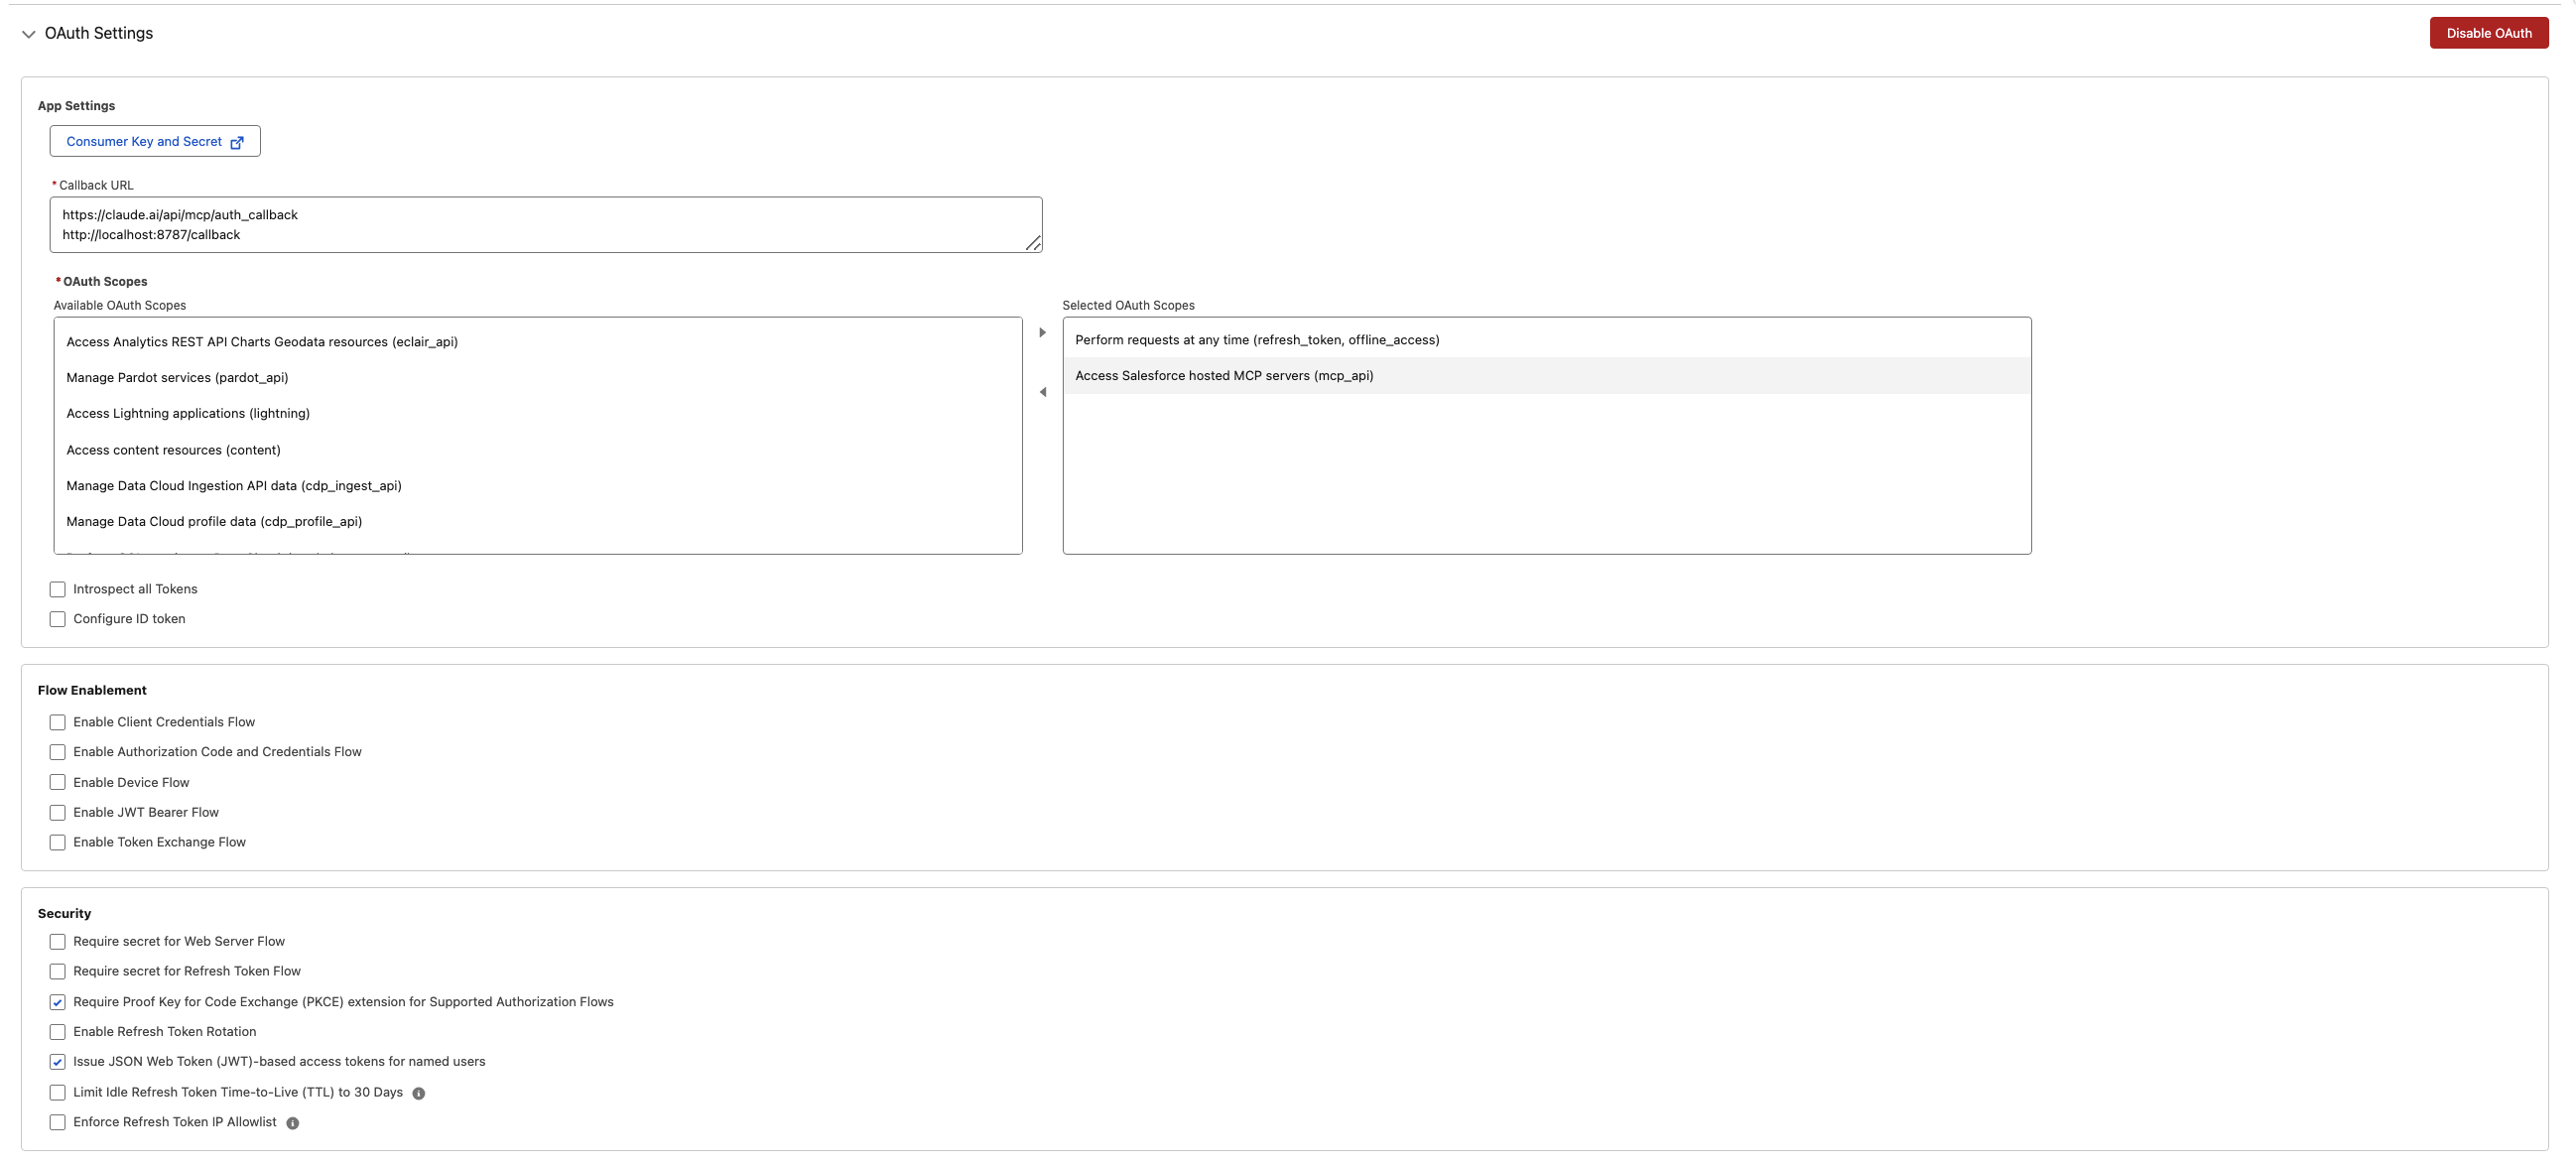
A cloud-hosted AI client signs in to your org through an External Client App (ECA). Pinion ships one — Pinion MCP — already built with the least-privilege OAuth scopes it needs (Access MCP servers + Perform requests at any time) and PKCE. So you don’t create an app or choose scopes. A few settings are org- and tool-specific and can’t be packaged, so you set those once on the shipped app.
In Setup → External Client App Manager, open Pinion MCP, then:
- Callback URL: set it to the OAuth callback (redirect) URL your AI tool uses for custom MCP connectors. Each tool publishes its own — check your assistant’s documentation for the exact value and paste it here. (It’s tool-specific, so it can’t ship in the package.)
- Set the two OAuth-policy settings below (they’re what most often block a connection).
- Open the app’s Consumer Key — this is your Client ID for step 3. Treat it like a secret and copy it only when you need it.
Two OAuth-policy settings that otherwise block the connection
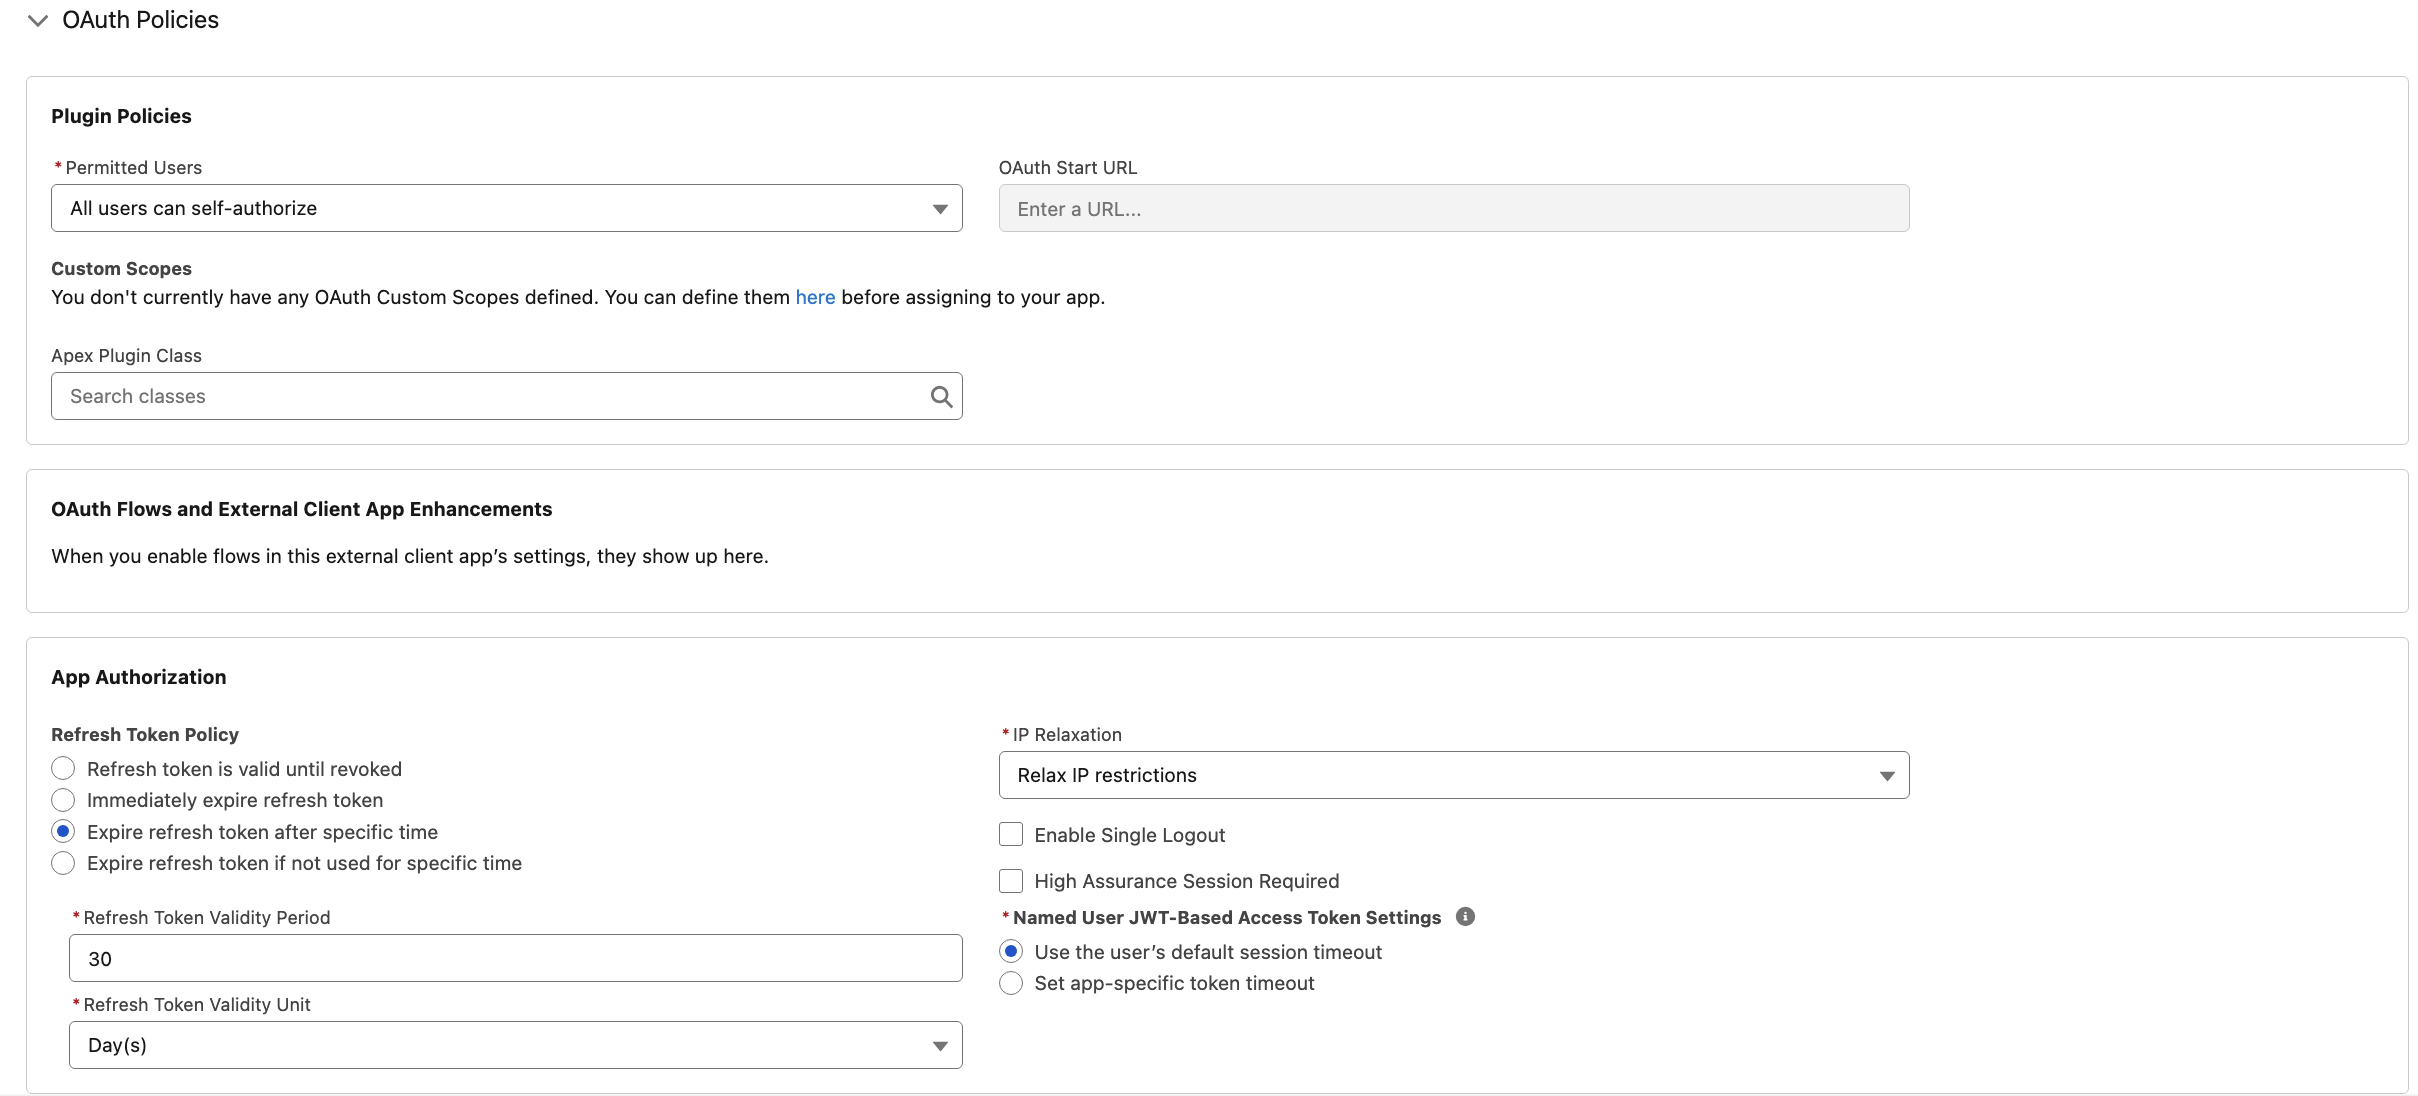
On the Pinion MCP app, open Policies → OAuth Policies and set both of these. Without them the browser sign-in appears to succeed but the actual tool call fails with a generic authorization error:
Limit who can connect (recommended)
By default an External Client App can let any user in the org self-authorize — so anyone could point an AI client at your Pinion tools. To restrict the connector to a pre-authorized set of users, gate it with a permission set:
- On the Pinion MCP External Client App, open Policies → OAuth Policies.
- Set Permitted Users to “Admin approved users are pre-authorized.”
- Pinion ships a
PinionMcpUserpermission set for exactly this. Add the Pinion MCP app to it (if it isn’t already), then assignPinionMcpUserto exactly the people allowed to connect. (You can reuse your own permission set instead — the point is the app is assigned to a set you control.)
Now only users with that permission set can authorize an MCP client against your org; everyone else is refused at sign-in. Grant it to your pilot group first, then widen it as you roll MCP out.
3. Copy the Server URL and Client ID
You now have the two values the client needs:
- Server URL — from Setup → MCP Servers → your server → Authentication Details → Server URL (step 1). Copy it verbatim.
- Client ID — the Consumer Key from your External Client App (step 2).
4. Connect your AI assistant and authorize
This step happens in your AI tool, so follow its documentation for adding a custom MCP connector. Wherever that lives, you’ll supply the two values from step 3:
- the Server URL, and
- the Client ID.
Then authorize: your assistant opens your Salesforce org’s login in a browser. Sign in as yourself and approve — that’s what ties the connection to your own permissions.
If your assistant is available on more than one surface (a desktop app and a chat app, say), the same connector normally works across all of them once it’s added — you configure it once.
Verify it works
Ask your assistant a simple question — e.g. “What deals do I have?” or “What’s closing this quarter?” If it comes back with your opportunities, you’re connected. This uses the Find deals tool, which needs no configuration at all, so it’s a clean first smoke test on any org. See Using the tools for the full set.
Related
- Overview — what MCP unlocks and the security model.
- Using the tools — the tools you just published and how to ask.
- Configurator ▸ Building a quote — how a configuration gets synced so its lines exist to explain.